Thursday, October 14, 2021

How Are You Able to Co-write with Your Wife and not Kill Each Other?


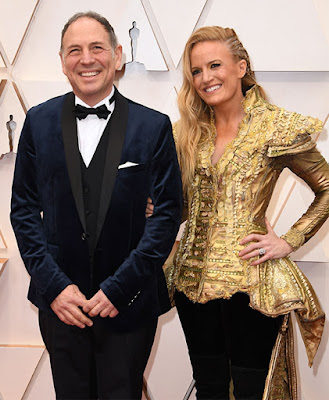
At the recent Ivor Novello ceremony, the number one question I was asked was some version of "How does your collaboration with your wife work?"  Followed by, "How can you do that without killing each other?" 

We were at the awards because our co-written score for the charming animated feature, Two by Two: Overboard, received a nomination for "Best Original Feature Film Score."


And as our first officially co-written TV series will debut on October 10th, 2021, I wanted to take a moment to answer this question for all time.


As many will already know, Eimear and I have been together since 2005, were married in 2008, but only recently started creating scores where everything is officially co-written by both of us.  

But in truth, most everything either of us have done for the past 16 years has benefited from our creative partnership - not to mention two boys, Maël and Eliam, 3 and 8 respectively.

So how does it work?

Knowing Your Strengths

Both Eimear and I are composers, songwriters, lyricists, orchestrators and music producers with decades of music education.  We both compose directly into Sibelius so ideas are easily shared.

Neither of us really needs the other to write music, still, both of us have our individual strengths.

Eimear is one of the greatest conductors on the planet having studied diligently at the craft since she was 15.   Before Covid, she would conduct as many as 40-50 concerts in a year.  She has an encyclopedic knowledge of the orchestral repertoire, she sang in choirs growing up and is a brilliant flutist (although she rarely plays).  

Eímear wrote her first orchestral compositions as a teenager and had her choral compositions performed on the radio at only 17.  Her music degree is from Trinity College Dublin and she is also being given an honorary doctorate in music from National University of Ireland, Galway.

Conversely, I am jazz guitarist who spent all his formative years writing for and performing in big bands, jazz combos and rock bands.  I played string bass in the orchestra in high school but have since lost the ability to play upright.  I studied music at Indiana University and my music degrees are from U.C.L.A..

I always dreamed of writing for orchestra but I was out of college before any of my orchestral compositions were ever performed.  I am also an orchestral mixer and engineer, which really comes in handy.

So the first characteristic that allows us to work together is that although both of us bring our unique perspective and history to the partnership, the vast majority of our skills overlap.  

If the music we have to create plays to either of our strengths, we have the other to call upon for guidance.  We are our own best sounding boards and harshest critics.  We push each other to write better and call each other out when what we are writing doesn't rise to the level of our joint ability.  

Simply put, we are much stronger together than as individuals - even when we don't agree (which absolutely never happens... really, never).

Division of Labor

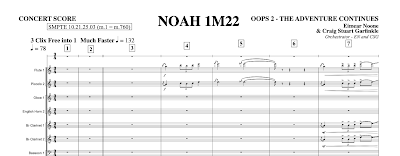
Top of a score page with our shared credit.


The division of labor will take many forms and is fluid based on what's needed for the project.  I'll use Two by Two: Overboard as an example.

We will jointly make all the decisions on genre and orchestration so that each of us is drawing from the same models and are writing in the same style.

While composing we will start by focusing on the crucial scenes that required unique thematic material.  Having these themes solidified is key so that we can later adapt these themes to other moments in the film, regardless of who is actually writing the music for a specific scene.   In this way, I could easily be scoring a scene with a theme Eimear composed, or visa versus.

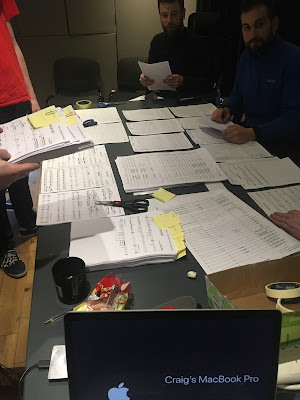
Then, we will literally split the cues by scene, each of us being responsible for about half the film.  We share all the Sibelius files so we might easily copy, intermingle and/or adapt each other's orchestrations and themes. 

We often argue over who gets to score what scene as both of us may recognize a golden moment that lets the composer shine.  As in every marriage, compromise is vital to preserving a happy relationship - and as in every marriage, "compromise" can also have a fluid definition.  

The Recording Sessions


Early in our relationship,  I was hired to produce the music for an independent CD that required a small orchestra.  Naturally, I had Eimear conduct the session and assist with orchestrations.  

Our relationship was relatively new, and of the 40 or so players in the ensemble, maybe half knew Eímear and I were a couple.  So when I reflexively started a comment from the booth with the words, "Sweetheart...", the half of the orchestra that knew we were a couple found it endearing while the other half thought I was being a sexist jerk.  I think by now everyone knows we are together, I would hope!

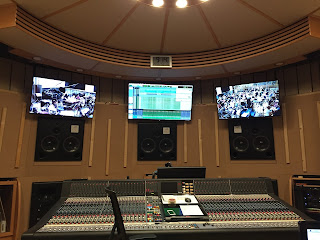
Over the years, we have evolved a system that works as follows:  In the recording sessions, I'll run the booth, but Eimear really runs the session from the podium.  Eimear hears absolutely everything in the room, even with only one exposed ear (the other in a headphone).  

So most of the time, I will say very little during the session.  My training as a jewish husband well prepared me for this.

Our workflow has evolved this way because even though I will read along as the take is recorded, making notes of things that are outstanding or need correction, invariably, when the take is over, I'll just listen as Eimear makes seemingly every comment or correction I might have noted.   If I were to speak up, I'd only slow the process and eat studio time.

It's only if I note something that Eimear didn't hear, or if I have a suggestion that she hasn't already proffered that I will speak up.

Post Production


Although I actually do the physical mixing of our music, the mixes are purely collaborative.   I'll get roughs started, and then we will go through every cue together.  I will completely rely on Eimear's fresh and fantastic ears to help mold the balances and make sure no element is missed.  That extra set of ears is priceless as by the time I have a rough mix together, I'll have at least an hour or two into every cue and one starts suffering mental and aural fatigue. 

As Eimear has said many times in the press, our biggest fights are usually over mixes as we both have our own approach to how music should sound.  We can usually find a compromise - usually...

Now the honest part:  

We are both highly sensitive creative professionals with strong opinions.  Being critical of each other is completely needed, but fraught with the dangers of hurt feelings and bruised egos.  That's one of the reasons why it took years for us to finally embrace the idea of creative partnership, despite the fact that it was always there.  Co-writing with your spouse will really test your relationship.

Being married to your business/creative partner also means that you can't separate work life from personal life.   It all becomes one element.  Thus, when things are stressed with deadlines or creative challenges, it effects every aspect of your life.  There is no escape!  

But when things are sweet - there is a shared experience that I feel is much deeper than if we both had our own unrelated careers.  Therefore, when we get the experience of a joint nomination like the Ivor Novello, or I get to go to the Oscars because Eímear has been asked to conduct the orchestra, there is nothing sweeter!  I get to experience these things with my best friend.  I can't imagine living life any other way.


Sunday, May 24, 2020

Strategies for Translating a Logic Pro Session into an Orchestral Score

Strategies for Translating a Logic Pro Session into an Orchestral Score By Craig Stuart Garfinkle

Recently I had the honor of being asked by the Tenerife Film Music Festival (Fimucité) to create an orchestral suite based on my classic original score to the video game, Baldur’s Gate, The Dark Alliance II. The suite would be performed live as part of their brilliant film music festival.


I was thrilled by the request. There would be 100+ in the orchestra and 60 in the choir. Thirteen years after I originally wrote the music, I was going to finally hear the score performed as I had originally intended – the game, due to financial constraints, had been created with only samples.

In this tutorial, using the example of this translation from Logic session to notes on the page, I will share my techniques and strategies of how I take an orchestral sequence and turn it into an orchestral score to be performed live.

As there is a lot of information to go through, I have arranged this blog in sections where I first go through the steps in list form within both the sequencer (Logic) and transcription program (Sibelius). Following the lists of the steps, I go into each step in detail. There are also links from each step to its description.

Preparing the Logic Session

First, you must prepare the Logic session for midi export. Even if you are not working in Logic, many of these steps will still apply.
The goal is to make the midi export as clean and easy for Sibelius (or Finale) to interpret as possible. To prepare the sequencer session for export:

1. Bounce the Logic session from what will be the downbeat of measure 1 in the Sibelius file (for easy synchronization).


2.  Save sequence as a New File!


3.  If not already done so, organize the track layout so that it reflects standard orchestral layout (as close as possible).


4.  Rename all tracks so that their names describe, in orchestral terms, what instrument or instruments a track is playing.


5.  Delete tracks or regions that are simply duplicate parts.


6.  If more than one region exists on a track, consolidate the regions such that only one region exists per track (especially for Logic users).


7.  Quantize all attacks to the largest duration possible – per phrase.


8.  Investigate the releases of notes to make sure the releases are not overlapping the next attack, except where such an overlap is part of the music.


9.  Place a tempo marker at the beginning of the music (not the session), where the downbeat of measure 1 will occur in the score. Then trim/snip the beginning of the session so that the start of the music is exactly at measure 1 in the Logic session.


10.  “Select All” and “Export/Selection As Midi File.”


This may seem like a lot of “preflight preparation” in advance of the midi export, but from my experience I have learned that moving giant blocks of data and batch processing regions in the sequencer is more streamlined, forgiving, and efficient than in Sibelius. We do all this work knowing that the clearer one makes the export, the easier the rest of the process will be.

Now, let’s go through all of these steps individually:


1. Bounce the Logic session from what will be the downbeat of measure 1.

As in the image below, select all the tracks. Then in the Sequence, set the bounce selection from measure 1 to the end. Then select File/Bounce/Project or Section (Command Shift B).


As you may be aware, Sibelius has the ability to play back video and/or audio in sync with the Sibelius file - as long as the tempo and meter changes in your Sibelius file match the source material, and they start at the same instant.

Therefore, having an audio bounce that is sample accurate to the downbeat of bar 1 is a “must have” for making this synchronization process as easy as possible to execute.

In this way, when you go to the “Playback” settings, and add your video/audio to the written score, you don’t have to worry about any type of offset. As long as your tempos match, just set the video/audio to trigger at the start of the first bar, as in the image below, and the exported audio will perfectly line up with your score.


SIDE NOTE:

As of this writing, May 24, 2020, Sibelius no longer works accurately in sync with video in any version after 18.7!  This is a real shame as it means I have to do all my work in that version, when the newest version, 20.3, has some really cool features.  Avid, get your act together.  If this has been fixed, let me know.

Second side note, for NotePerformer Users.

As you are probably aware, NotePerformer employes a one second delay to do all it's artificial intelligence-based interpretation of your score.  So if you are using note performer, and want accurate synchronization to video,  you need to build that into your settings.  I do that by telling Sibelius to start the video at negative one second  - as below.


Alternate bounces?


  1. Depending on the complexity of the score, I might choose to make more than one bounce from the Logic session – as examples, a string bounce, or a woodwind bounce, or a bounce with or without the percussion.


    Having these alternate bounces, especially when orchestrating a piece that’s not one’s own, allows one to focus on the individual family of instruments while transcribing without distraction – a priceless tool when you want to make sure you are being true to the original intent.

2. Save sequence as a New File with a new name!

I usually add the tag 4sib, or some other indicator to the name so I understand the function of the specific sequencer file – and how it differs from the original sequence. It might seem obvious, but we save as a new file so that we don’t mess up our original file.


Organizationally, I usually keep all my Logic, Sibelius and Protools sessions from a given composition or song in the same master folder, so having clear titles as to how each version functions is a must.


3.  If not already done so, organize the track layout so that it reflects standard orchestral layout (as close as possible).

I can’t count the number of times I have seen sessions that don’t follow this simple step – some even of my own.


There is a tradition of how scores are laid out, which all our transcription programs follow – but sequencers will let you put the flutes at the bottom and basses at the top. Percussion tracks can show up between brass tracks. This is just wrong!


By fixing the order now, it will make staves easier to organize and your first imports to Sibelius will make more sense.

4.  Rename all tracks and regions so that their names describe, in orchestral terms, what instrument a track is playing.

If you are like me, when I am in the heat of the composition battle, I am focused on getting the ideas into the sequencer as fast as possible. I don’t always pay attention to keeping everything as organized or as labeled as it needs to be. Regions are copied and moved without paying attention to the names or where they are in relation to other parts. By the time I am done, the music sounds neat, but the session can be a mess.


Additionally, in all the transcription programs, when you import a track, if the name is one that is recognized, the program will automatically pick the right clef and transpositions.

Specialty samples – having a clear name is a must.  

Then there is the odd track that triggers, for example, a sound that is a sample of an orchestral rise, or other Penderecki-esque complete performance. If the part is not labeled, when you import that midi track, you might see a simple whole note on a staff – and have no idea what it’s supposed to be triggering. 


5.  Delete tracks or regions that are simply duplicate parts used to trigger sample layers.

Depending on your own workflow, this step may or may not be needed. This step is mainly for those that use multiple tracks playing the same part in order to produce a layered sound – for example a Tutti string or brass section. The goal here is to reduce the number of exported tracks to the bare minimum that still covers all the parts, by deleting the extraneous data.


6.  If more than one region exists on a track, consolidate the regions such that only 
one region exists per track (especially for Logic users).

Just as it was with #5, the goal of this step is to reduce extraneous information or tracks that will simply frustrate you in the process of transcription. For example:


When Logic exports midi data, it creates a new midi track per region. So, in the example above, even though a track is all to be played on one instrument, each of these regions will become it’s own midi track – and Sibelius will see each as a new stave.


Therefore, prior to export, we need to “consolidate regions per track.” For me, I have a quick key set in Logic so that I can simply select all the regions in the score, press my key command, and the result is one nice and neat region per track.


Taking steps 3 to 6 together, the result should look something like this:


7.  Quantize all attacks to the largest duration possible – per phrase.


8.  Investigate the releases of notes to make sure the releases are not overlapping the next attack, except where such an overlap is part of the music.


  1. I'll take 7 and 8 together:

  2. Sibelius will do the best it can to make sense out of your sequence, but you have to give the program a fighting chance. Regardless of your thoughts on what should or should not be quantized due to musical considerations, the more accurate your note attacks and releases are to a recognized note grid, the cleaner your transcription will be and the less cleanup will be needed.

    For anyone who uses sequencers on a regular basis, quantizing note attacks should be second nature, but we don’t often spend as much effort focusing on where notes end.

    So in your sequence, you might have a section that is a simple 8th note pattern that looks like this:


    This might sound just fine, but when transcribed, it might be a mess:


    What you want in the Logic file is something that looks more like this: where the attacks and releases of each note fall squarely on the grid.


Quantizing releases using the “force legato” command:


  1. Cleaning up the note releases doesn’t have to take long. To make this process go faster, I use the Logic key Command, “Force Legato,” which will either extend or trim the release of a note to the next selected note. To execute this, simply highlight the notes you want to standardize, and execute the command.


    Don’t be thrown by Logic asking if you want to “shorten” the notes. That has always bugged me! These notes will be made longer, as we saw in the previous image, to match the next attack.

    As seen below, the notes then all transcribe as simple quarter notes. Then, during the orchestration process, we put the articulations that correspond to the differences in the note lengths – thus creating a part that a player can read easier than the first transcription.


  2. 9.  Place a tempo marker at the beginning of the music (not the session), where the downbeat of measure 1 will occur in the score. Then trim/snip the beginning of the session so that the start of the music is exactly at measure 1 in the Logic session.
    Many of you, myself included, may have an extra bar or two at the beginning of your sequencer session to allow for controller chasing, patch changes, key commands, or other technical reasons.

    This is fine for the sequence, but players really don’t like starting their music on anything other than bar one. With 100+ players in an orchestra, starting at your piece at a place other than bar one adds unnecessary confusion, wastes time in explanation, or even worse, might result in an errant entrance when someone miscounts.

    Therefore, in step nine we place a new, redundant tempo marker at the downbeat of what will be “Bar One”


    Then we execute the cut command from the beginning of the sequence to what will be bar one in the music.


    Trimming the sequence now to the downbeat of bar one will save you from having to remove these bars from the Sibelius file later, and it will also give you a sequence file whose measure numbers match your score.


  3. “Select All” and “Export/Selection As Midi File.”


By the time you have gone through all the steps above, one should have a session that looks something like the one above. All tracks are prepped and ready to be exported.

The Sibelius File


Now the fun begins – turning the midi tracks into notes that can be read. Here are my steps for doing this in the most efficient manner:

  1. 1.  Open the exported Midi File in Sibelius.

  2. 2.  When prompted, select the appropriate Sibelius import settings (I will go into detail later) understanding that we may actually be executing multiple imports.

  3. 3.  Name the imported file with the title of your piece with the tag “source.”

  4. 4.  Open an appropriate Sibelius template, without closing the open Midi File, and give it the name of your piece.

  5. 5.  In Sibelius, go to the menu, Play/Video and Time, and select the audio bounce of the sequence that you created from “Bar One” and add it to your imported Midi and your template file – making sure the audio is triggered to the downbeat of your bounce.

  6. 6.  Switching back to the transcribed midi file, correct/create any system text such as titles, dedications, subtitles, etc., within the imported Midi file.

  7. 7.  Using the imported audio as a reference, in the imported Midi File, create score formats and roadmaps, such as double bars, rehearsal letters, metric modulations, or other general layout information.

  8. 8. When you are confident your roadmap contains all the important information, triple click on a single stave in order to select the entire staff – I usually use the top staff.

  9. 9.  While the entire staff is still highlighted, command click on the first meter marking, thus selecting your just created layout, tempos, system text and meter changes as well as all the notes on that track.

  10. 10.  Going back to your open template, triple click on the top stave.

  11. 11.  Paste your copied data onto this track, thus setting the format, titles, and so on into the template file.

  12. 12.  Add two (or four) “dummy staves” to the bottom of your now saved template file. Usually I pick a piano track and simply move it to the bottom.

  13. 13.  Switching to “Panorama View” and “Focus on Staves,” using the dummy staves as a “stopover,” the act of orchestration becomes the process of continually transferring data, an element at a time, from the source file, to the dummy staves, and determining how the notes should be distributed to the actual parts.

Now, lets go into more detail in Sibelius:

1.  Open the exported Midi File in Sibelius.

2.  When prompted, select the appropriate Sibelius import settings understanding that we may actually be executing multiple imports.

Lets attack these two together. Once you try to open your exported midi file in Sibelius, this window pops up; lots of options and two sub-menus: Midi File and Notation.

Let’s look and Midi File first:


  1. The above are the basic settings I use. A quick look, and a bit of critical thought should reveal these options are mostly self-explanatory.

    The only item that I feel bears explanation is the show/hide metronome marks option.

    Understand, whether or not they are visible, the metronome marks are still active within the imported midi file. Therefore, I choose not to show them as I often have so many retards or accelerando that if all metronome markings are visible, the result is a mess where I have to manually hide most of them anyway.

Next is the Notation submenu. These are my general settings:


  1. This is where a bit of strategy comes into play, based on the musical content. For my first transcription of a midi file, I always choose the largest “minimum duration” and “tuplet” that I can get away with. In the case above, I chose an 8th note and basic triplets and septuplets.

Not setting a minimum duration or setting it too small:


  1. If your minimum duration is too small or not set at all, Sibelius will make a mess out of your file transcription trying to be exact to your minimum durations – so you have to dumb Sibelius down. As in the example above, to read only 16th notes, or even an 8th notes as a minimum duration.

    I find this usually gives me the cleanest basic transcription – understanding that some of my quintuplets and septuplets or other passages will be turned into chord clusters. I find it is easier to fix these isolated “cluster” problems after the fact than deal with a multitude of 32nd notes rests and weird ties.

    Here’s a passage with no minimum input duration – even when quantized.


    And the same passage with an 8th note input minimum duration.


    When the music is more complex, I simply change the input minimum to a smaller duration, and execute a second input of the midi file knowing I will ignore most of it, but when I get to the section that is more complex, I’ll have the choice of either rewriting the part from scratch, or seeing how well the section was transcribed with the smaller minimum input duration and deciding which solution is most efficient.

4.  Name the imported midi file with the title of your piece with the tag “source.”

This should be your standard operating procedure for all your file organization – constantly rename and save your files, identifying key versions to which you can “revert” when things go wrong (which they inevitably will). I use the tag “source” for any file that I copy information from. I might also add a text tag denoting the minimum input duration set.


5.  Without closing the open Midi File, open an appropriate Sibelius template, and give it the name of your piece.

Addressing the needs of the Baldur’s Gate Suite:


  1. This was going to be a large group. Triple winds, 5 percussion, an abundance of strings, massive choir, multiple keyboards, harp; how do I organize so many staves?

    Over time, I have created countless templates and score pads reflecting different size ensembles, the demands of a specific client, etc., so from the start I had a template in mind. In this case, I grabbed one of my old sessions from a past World of Warcraft recording session, which also had this large ensemble, and stripped it of data and saved it as a new file.

    Even if you don’t have this experience to fall back on, Sibelius, as well as a number of third parties, have countless templates to choose from.

  2. In Sibelius, go to the Play tab and select the audio bounce of the sequence that you created from “Bar One” and add it to your imported Midi and your template file – making sure the audio is triggered to the downbeat of your bounce.


    We already discussed this a bit. What we want is an audio file that plays in perfect sync with the translated midi file. Especially when it’s not my composition, I want to make sure I can reference the original sequence against the audio to know what the transcription should sound like.

    And to recap, I’ll often repeat this step for each of the instrument families so that I can focus on just that family; i.e. Stings, Brass, Percussion, Etc.

    Once the audio is attached, using the audio volume slider on the right side of the video window, I will continually turn it up or down to confirm that the transcription represents what I am hearing.

6.  Switching back to the transcribed midi file, correct/create any system text such as titles, dedications, subtitles, etc., within the imported Midi file.

7.  Using the imported audio as a reference, in the imported Midi File, create score formats and roadmaps, such as double bars, rehearsal letters, metric modulations, or other general layout information.

Taking steps 6 and 7 together, they require a little explanation, both in substance and for why I execute these in the main transcribed source midi file, not the template file.

About the roadmap:


  1. I am always trying to imagine myself sitting in the orchestra, reading the parts I am creating, striving to make the music the players read as clean and clear as possible. The players won’t know the music so how do I give them the best opportunity to sight-read it well? Having clear phrases and an easily discernible roadmap is key!

    With this as my focus, I use copious double bar lines, rehearsal marks, and as much “System Text” as needed, to help make the roadmap crystal clear. The players should be able to read this roadmap, and even if they are not counting measures, they should be able to hear where they are.

    For example, if the beginning of a new theme obviously begins at measure 67, I’ll insert a double bar, a rehearsal letter, and the system text “new theme” at that measure. In this way, even if a player gets lost counting bars rest, they will subconsciously know where measure 67 will occur, based on listening to the music around them. The player will hear the cadence of the proceeding section, the new theme being set up, and then, when the theme enters at measure 67, they will hear the theme and intuitively know where they are. This is much better, say, than having a player count 67 measures rest and hoping they come in at the right spot.

    Why do we create the roadmap in the “source” file?

  1. This is because I know from experience that the best way to make sure I don’t mess up my roadmap is to paste all the data, in one motion, from the source midi file into the template file (steps 8 – 11). If you follow my instructions, the result will be a mostly blank score pad where all the tempi, meters, and other system text are in the right place and just waiting for you to add the notes to the empty staves.

8.  When you are confident your roadmap contains all the important information, triple click on a single stave in order to select the entire staff – I usually use the top staff.


9.  While the entire staff is still highlighted, command click on the first meter marking, thus selecting your just created layout, tempos, system text and meter changes as well as all the notes on that track.

As you will notice in the image below, at this moment, the highlighted track will now have two lines around it (or be darker purple in Sibelius 8 and above), and all your system text, meters, and roadmap information will also be highlighted. Copy all this data (Command C).


10.  Switching  back to your open template, triple click on the top staff.


11.  Paste your copied data onto this staff, thus setting the format, titles, and so on into the template file (click yes when prompted - You can ignore the warning).


After pressing paste, in addition to the single staff’s notes, you should also see your system text and roadmaps in the new file, ready for you to copy and paste the rest of the notes into the template (see below).


12.  Add two (or four) “dummy staves” to the bottom of your now saved template file. 

Usually I pick a piano track and simply move it to the bottom.

13.  Switching to “Panorama View” and “Focus on Staves,” using the dummy staves as a “stopover,” the act of orchestration becomes the process of continually transferring data, an element at a time, from the source file, to the dummy staves, and determining how the notes should be distributed to the actual parts.


These two steps together form the vast majority of the time and effort in translating your file and will have another post of it’s own. In the meantime, I’ll give a few highlights now of how I work, using these dummy tracks.


The “Focus on Staves” and “Panorama View.”


I find that as an orchestrator I have to constantly shift my focus between the “micro view” and the “macro view.” The micro view is when, in “Panorama Mode” I select just a few staves at a time, such as the contra bassoon, bass trombone, tuba, lower celli, basses, and my dummy tracks, and then press the magic, “Focus on Staves” command (option command F on a Mac). The result looks like this:


As you can see, I have put in a lot of the detail already, but this passage started with my determining the best way to distribute the passage on the bottom two staves to the low winds, brass and strings for the desired power and effect.


More Hints:


Execute your articulations and polish in the dummy staves.


I also do my best to articulate and add dynamics to the dummy tracks, before I start distributing, so that I only have to create these once; otherwise you can spend as much time re-creating, copying, and matching the articulations and dynamics as orchestrating.


Looking to the example above, at measure 146 there are repeated forte/piano crescendo markings. I create these once in the dummy track so that when I copy this part, the dynamics move with the part.


Looking at the Macro:


Only after I have worked through all the micro, do I start looking at the macro – the entire score and how it works together.


I’ll select each of the families, first investigating how they work on their own, then how they work in pairs, and then finally, all together – constantly referring back to both the complete audio and my family stems to make sure the orchestration is both accurate, and complete.


Summary:

Orchestrating a sequence for live performance is like putting together a huge jigsaw puzzle, but the picture on the box might not exactly represent the pieces you’ve been given nor the complete image - but with patience and a streamlined attention to detail, one has the best chance of making the best possible representation of the image.


And as I always like to say, only the first few hundred times you do it are the hardest.


Next up: Using our sequencer tools to render our orchestral score.